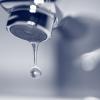
If you have a problem with a tap, for example, a drip, a reduced flow rate, or a failure to turn on, you might assume that the tap cartridge needs replacing. And this might well be the case. But it could also be possible to fix the problem with a descale and clean. As such, knowing how to clean and descale a ceramic tap cartridge is a great skill to have. One that will help you to quickly resolve the problem and save you the cost of paying someone else to do it.
Why do you need to clean a tap cartridge?
Taps with ceramic discs don’t need much maintenance as they are exceptionally durable and designed to last a lifetime. But from time to time, problems do arise, particularly in hard water areas where limescale can build up and cause problems. Indeed, it is not uncommon for limescale to disrupt water flow and stop a tap from working correctly.
Cleaning and descaling your tap cartridge every so often will prevent the build-up of limescale and stop problems from occurring in the first place. And, when a tap stops working properly, a quick clean might be all that it needs.
What is a ceramic tap cartridge?
Traditional taps have a watertight plastic tap washer that directs water towards the seat of the faucet and out the spout. If the washer is damaged, water might leak out through the body of the tap.
But today, most modern fixtures are washer-less, and ceramic discs/valves have replaced traditional rubber washers. Ceramic cartridges are like ceramic discs but are designed specifically for single monobloc taps.
Commonly made of brass, chrome, zinc, or plastic and comprising two ceramic discs with holes placed one on top of the other, the valve either allows water to flow through the tap or stops this flow completely.
Newer, more modern fixtures with ceramic tap cartridges will deliver improved long-term durability if you want to reduce the chances of dripping faucets and other maintenance issues.
Cleaning a tap cartridge
Just like the rest of your kitchen or bathroom, the insides of your tap cartridges will benefit from a quick clean. Although the good news is that you don’t need to do this as often as you wipe down your worktops, shower, hob, sinks, etc.
A quick descale and clean might also fix a faulty tap. However, if the disc is scratched, worn or otherwise damaged, it will likely need to be replaced.
To clean a ceramic valve, you might need:
• A suitable screwdriver
• An Allen key
• An adjustable spanner
• Pliers
• A spare toothbrush
• Vinegar
• A bowl
• A clean cloth
• A towel
PREPARATION IS ESSENTIAL
To clean the tap cartridge, you should:
• Turn your water off at the mains or find the supply to the faulty tap. The latter is done via an isolation valve underneath the tap.
• Turn off the heat supply (boiler/immersion) to that tap.
• Plug the sink to ensure you don’t lose any parts down the drain and place a towel in the sink bowl to protect it from any knocks, scrapes or drops.
• Mix some warm water and a little vinegar in your bowl.
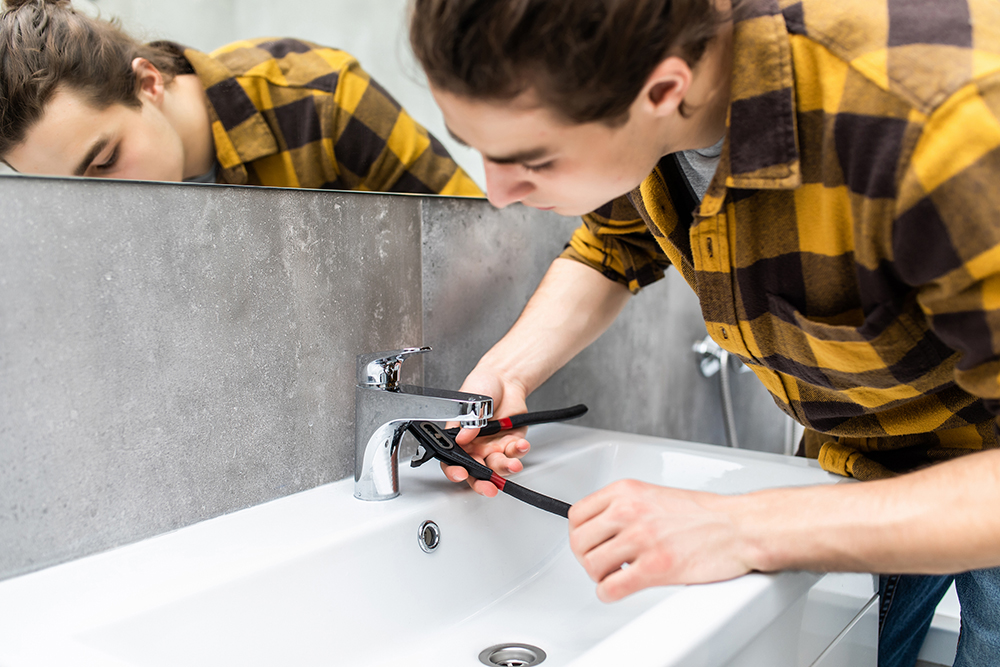
DISMANTLE YOUR TAP
Now you have completed the preparation, you can dismantle the faulty tap.
• Remove the decorative cap from the tap.
• Unscrew the tap handle (some models may need a screwdriver while others require an Allen key)
• Use the spanner to remove the nut on the base of the tap.
• Carefully remove the ceramic cartridge (you should be able to do this by hand, but you might need pliers if it is stuck).
• Check the valve to ensure it is in good condition. If it is damaged, it will need replacing.
TOP TIP: When dismantling a tap, always lay the components out in the order you removed them to make re-assembly easy.
CLEAN THE VALVE
If it needs cleaning, soak the ceramic cartridge in the water and vinegar to remove any limescale. This should take around 10 minutes, but you can soak for a few hours if necessary.
• Gently clean the valve and inside the tap with the toothbrush to get rid of any limescale. It is important not to be too vigorous when cleaning or you might damage the cartridge.
• Wipe the tap and cartridge with a clean cloth and make sure there is no remaining muck.
REASSEMBLE YOUR TAP & FINISH UP
Once you are happy that everything is clean, put the cartridge back together, turn your water and heater back on, and test that there are no leaks. You can then tidy up the sink and give yourself a pat on the back for a job well done!
If the tap is still faulty, you might need to replace the tap cartridge.